Most features can be handled with a mouse click as well as by right clicking (On Mac: press and hold the Control (Ctrl) key while you click the mouse button.) using the context menus. The following is a screenshot of the file manager interface:
- Folders Pane – contains the "tree view" of the folders that you can navigate. Folders are used to organize and categorize your files.
- Files Pane – lists the files available in the selected folder.
- Toolbar – a series of buttons that can be clicked in order to quickly execute specific file browser functions.
- Status Bar – the section at the bottom of the interface that displays some information about the selected file, the total number of files in the folder, etc.
- Context Menu – a popup menu with file browser commands that execute specific tasks for the object that was selected. Options available in the context menu change dynamically depending on the object that is clicked
Uploading
The Upload button that is available in the Toolbar opens the Upload Pane which you can use to add new files to the current folder.
The figure below presents the default file browser Upload Pane that is expanded when you click the toolbar button.
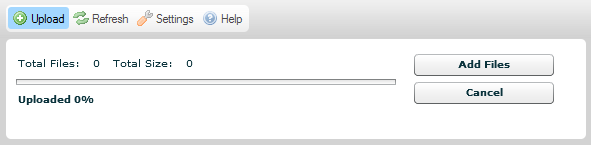
In order to close (collapse) the Upload Pane, press the Cancel button or click the Upload toolbar button once again.
Multiple File Upload
- Click the Folder you wish to upload to.
- Click the Upload toolbar button to open the Upload Pane.
- When the Upload Pane expands, choose the Add Files button. A native file selection dialog window of your operating system that opens will let you choose the local file to be uploaded to the server.
You can choose as many files as you want by selecting them in the dialog window all at once.
- The local file(s) will now be added to the upload queue. If you want to add further files to this upload batch, click the Add Files button again and repeat the steps described above.
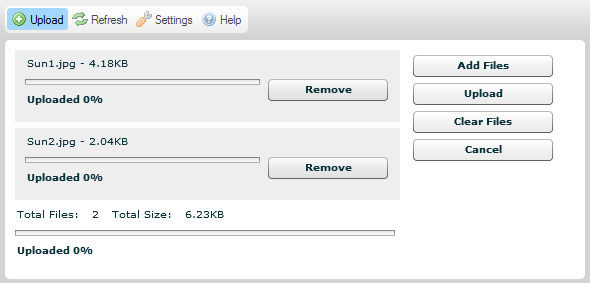
- If you change your mind about the files that should be sent to the server, you can always either remove individual files from the upload queue by clicking the Remove button next to the file, or decide to cancel the whole upload process by choosing the Cancel button of the Upload Pane.
- If you are ready with the file selection process, you can click the Upload button to start the upload. The progress of the whole process as well as individual files can be observed on the screen.
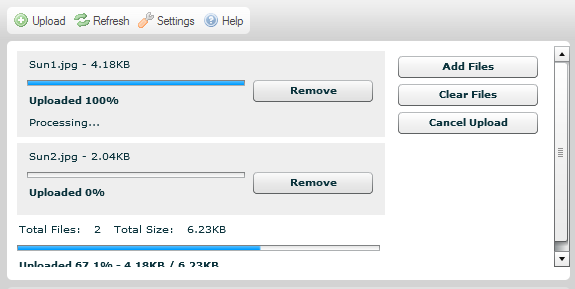
- Wait for the upload to terminate. Once it is completed, the folder content will refresh and the uploaded file will be selected in the cFiles Pane.
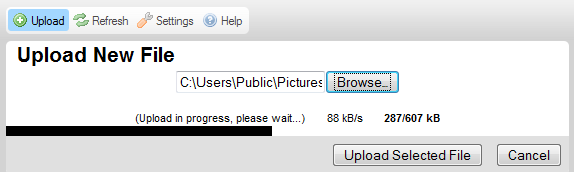
Single File Upload
When Adobe Flash is not available in your system, the uploader will still be fully functional, though limited to uploading one file at a time. In order to send the file to the server, follow the steps described below.
- Click the Upload toolbar button to open the Upload Pane.
- When the Upload Pane expands, choose the Browse button. A native file selection dialog window of your operating system that opens will let you choose the local file to be uploaded to the server.
- The local file will now be selected. You can only upload one file at a time.
- If you are ready with the file selection process, you can click the Upload Selected File button to start the upload. The progress of the file upload process can be observed on the screen.
- Wait for the upload to terminate. Once it is completed, the Upload Pane will be closed, the folder content will refresh, and the uploaded file will be selected in the Files Pane.
Upload Errors
The following error messages may appear when uploading files.
A file with the same name is already available. The uploaded file was renamed to "filename(1).ext"
This message indicates that the uploaded file name is already in use by another file in the same folder. To avoid conflict, a consecutive number, the "(1)", was appended to the original name.
Invalid file
The file that you attempted to upload was not accepted.
Upload cancelled for security reasons. The file contains HTML-like data.
The uploaded file contains HTML code. For security reasons, only files with selected extensions are allowed to contain HTML code.
Advanced Operations
Context Menu
To view the context menu, right click (CTL click on an Mac). Depending on the circumstances, the following options may be available:
|
Selecting a File
To select a file by using the context menu, right click the image (CTRL +click on a Mac) choose the Select option. Alternatively, you can also perform a double-click on the file with your mouse.
Viewing (Previewing) a File
To preview a file in the browser, choose the View option from its context menu. Not all kinds of files can be viewed in browsers, but this feature is quite useful for images, text, and PDF files. In other cases, the browser will ask you to open the file with an appropriate application.
Depending on your browser and operating system settings, the file will be displayed in a new browser tab or a new browser window.
Downloading a File
In order to download a file, choose the Download option from its context menu. The browser will ask you for a location on your computer to save the downloaded file. Depending on your browser and operating system settings, the file might also be opened immediately after it is downloaded by using an appropriate application of your operating system.
Resizing a File (Image)
In order to change the image size or its thumbnail size, choose the Resize option from its context menu. Once you enter new image dimensions or choose a thumbnail size, close the dialog window to apply the changes.
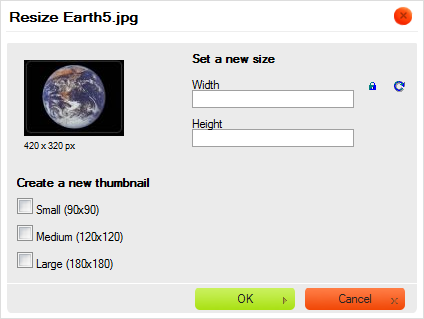
If the image is too big, you can alter its dimensions by entering new values into the Width and Height fields. By default the image ratio is locked, which you can see thanks to the ![]() (Lock) button. This means that when you change one of the size values (width or height), the other one will be adjusted automatically.
(Lock) button. This means that when you change one of the size values (width or height), the other one will be adjusted automatically.
If you want to freely modify both dimensions, click the Lock button in order to unlock the ratio. The button will now change to ![]() (Unlock) and modification of one dimension will not automatically cause the other one to be adjusted. To lock the image ratio again, click the Unlock button once more.
(Unlock) and modification of one dimension will not automatically cause the other one to be adjusted. To lock the image ratio again, click the Unlock button once more.
You can easily return to original image size by pressing the ![]() (Reset Size) button. This will reset the image size; the original width and height will now appear in appropriate text boxes.
(Reset Size) button. This will reset the image size; the original width and height will now appear in appropriate text boxes.
If you resize the image, you can decide to save it under the same name, overwriting the existing file. Please note that this operation cannot be undone and once you save the file with its modified dimensions, you will not be able to restore the original size. In order to overwrite the original image, leave the Create a new image checkbox unselected.

You can also decide to save the resized image in a new file and leave the original as is. If you select the Create a new image checkbox, you will be able to give the modified file a new name. By default the file manager suggests to save the image under the name that is built from the original file name and new file dimensions (for example: Sun1_100x100.jpg when the original file was named Sun1.jpg and the file was resized to 100 pixels wide and 100 pixels high).

When you are ready with your changes, click the OK button to close the dialog window. On successful resizing a confirmation message will be displayed.
If you saved the resized image in a new file, you will see both files appear inside the folder.
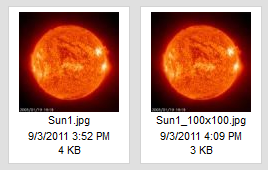
Original and resized file
Note: The size of the original image may limit the options available for the Resize feature. The modified image size cannot exceed the original dimensions.
Edit in Pixlr
Pixlr is a set of image tools and utilities, including a photo editor for image cropping, rotation and editing. Online Candidate does not provide support for Pixlr. For help with Pixlr, visit support.pixlr.com
Generating Thumbnails
The Resize feature can also be used in order to generate resized copies of images (thumbnails) that you can use in articles on your website or in blog posts. Thanks to the thumbnail resizing feature the site administrator can set predefined thumbnail size options that can be used by the file manager users. This will save you the effort to manually enter modified width and height values for each image and will let you keep the thumbnail sizes consistent across your site.
In order to use one of the predefined thumbnail sizes, choose the Resize option from the image context menu. In the Create a new thumbnail section of the Resize dialog window select the checkbox(es) representing the desired thumbnail size(s). On successful resizing a confirmation message will be displayed. The resized image copies will be created in the same folder and the new files will be named according to the thumbnail size option that you choose (with _large, _medium and _small suffixes added to the original file name).
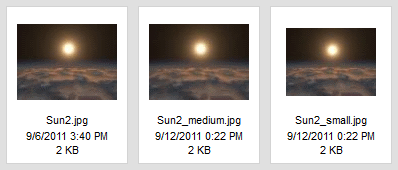
Note: If the image is smaller than some of the thumbnails options (see example above), the ones that are unavailable will be grayed out.
Renaming a File
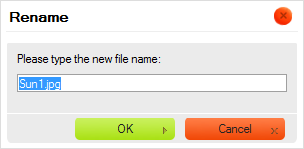
In order to rename a file, choose the Rename option from its context menu or use the F2 keyboard shortcut. Type the new file name in the dialog window that will be displayed, overwriting the existing name. Once you enter the new file name and close the dialog window, the file will be renamed.
Not all characters can be used in folder and file names due to limitations of the systems where the file manager runs. Among the characters that cannot be used in folders and files names are: / : * ? " < > and |.
Attention: When you rename a file, links or media insertions available on other pages and pointing to the renamed file will be broken, and thus not available anymore. Because of that be careful when using this feature.
Deleting a File
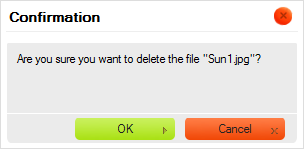
In order to delete a file, choose the Delete option from its context menu or use the Del key. A confirmation message will appear to ensure that this operation is what you really intend to do. Once you confirm the deletion, the file will be removed.
Attention: This operation cannot be undone. Once you delete the file, you will not be able to restore it.